

My youngest is graduating from college this weekend (YAY!!!!), so I wanted to make something to wear. I thought a skirt and top combo would be nice, so I pulled Style Arc's Sorrento Pattern out of my stash and got going.
Pattern Description:
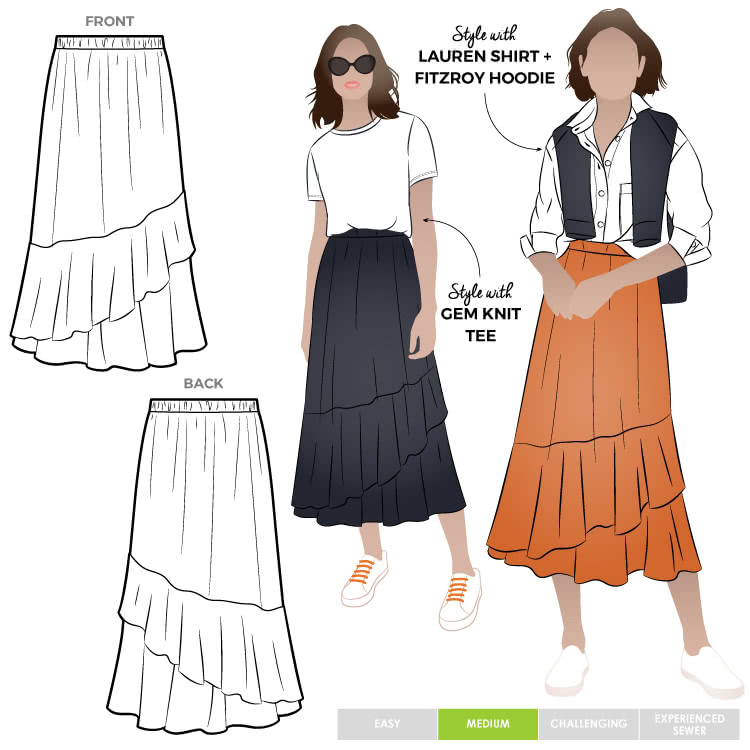
Per Style Arc, "On trend mid length skirt featuring asymmetrical flounces and an elastic waist. The "A" line shape falls beautifully into a double angled flounce."
My additions: pull on skirt with two flounces and elasticized waistband.
Fabrics/Notions Used:
The fabric for the skirt is a silk/cotton voile from very deep stash. It's at least 6 years old, so sorry - it's not available for sale.
The underlining is Wide Calamo Silk Habotai Lining - Natural White. That one is available.
I used 1 1/4 inch wide elastic at the waistband, and thread.
Construction Notes:
There are 4 pattern pieces: Skirt body, waistband, upper flounce, and lower flounce. Because my fabric is semi-sheer, I underlined the skirt body with silk habotai. I basted the underlining to the outer fabric with cotton basting thread at about 3 inch intervals so the fabric wouldn't shift while I was working with it.

I sewed the two main skirt pieces together at the side seams, using a straight stitch on my Juki DDL-8700, and serged the raw edges together, then pressed them toward the back.
The directions have you hem (or as they say, "neaten") the flounces prior to attaching them. I used Ban Roll to do narrow hems on the flounces. To do this, I start by sewing the Ban Roll strip to the right side of the flounce. Once it's sewn, I remove the cross-threads, leaving the vertical threads as a guide for pressing and turning.

I press the Ban Roll flat, then I turn it to the wrong side using the Ban Roll "teeth" as a guide, and press. This gives me a nice clean doubled hem.

Stitch close to the fold, then remove the Ban Roll and press. Voila! A nice, clean narrow hem.

Once the hems were done, I basted the flounces together and attached them to the main skirt using a straight stitch. I then serged the raw edges and pressed.

Finally, I sewed the waistband. The band as drafted was a little shorter than I wanted, so I added one inch of length. It still eased onto the skirt without a problem, and gave me a little more comfort for pulling the skirt on. I attached the waistband, gave it a final press and ta daa! Here's a picture of the finished front. The back looks the same.

And here are a couple of detail shots of the inside of the skirt and the flounces.


Overall Impressions:
This is a very easy pattern that I made slightly more complicated with my choice of fabric/underlining. It goes together easily and fits me well (I made a size 10). I can easily see this in a rayon challis for a day to day look or a four-ply silk crepe for dressier occasions. I like it very much, and the swingy flounces are fun. I'll wear it to DS the Younger's dinner tomorrow night and hopefully get a picture of me in it. I would do it again (probably in a rayon challis), and I recommend it for all skill levels.
Have a great Memorial Day Weekend, if you're in the US, and a great weekend wherever you may be. I'm out until Tuesday, but I'll be posting on IG from the graduation, so check there for early pics.
Happy sewing!

