
Well, it has been an age since I last blogged. I have been sewing quite a lot, as you can see if you follow my Instagram Account. But for the last month or so, all my sewing has been taken up by one epic project and class: Susan Khalje's Classic French Jacket. This is an in-person class (she also offers an Online Version) that I had signed up for in 2019 to take in 2020. Due to a little speed bump called COVID-19, I ended up postponing. But thank Science, I was able to safely attend in September of this year.
I am so glad I was able to go! The class was amazing, with 7 students plus Susan working in her spacious rug store/classroom. Susan is a wonderfully generous teacher, taking the time and possessing all the patience in the world to give each student the tools and knowledge needed to successfully complete the jacket. If you have the chance to take a class with her, do it! You will find that it is worth every second and every penny.
Without further ado, let's jump into the jacket construction...
Fabric Used:
Okay, let me tell you first up that the fabric is NOT from Gorgeous Fabrics. Four years ago, I went to Paris to 1 - see the Dior exhibit, and (more importantly) 2 - celebrate the termination of what had become a toxic business partnership. While I was there, my friend Joanne and I went to Jannsens & Jannsens, a jewel-box of a shop off rue Faubourg Ste. Honore that carries the most exquisite couture fabrics. There I bought bouclé and a complementary silk crepe de chine. I planned to make it into a Chanel-style jacket, and this class enabled me to do just that.
Construction:
There are many steps, as you might imagine, so rather than describe, I'll give an abridged pictorial history of the making of this jacket.
1 - Make a Muslin. Here's a hint: the measurements on Susan's pattern envelope are for the finished garment measurements, not body measurements. Ask me how I know 😆. I did a little tweaking, then left the fine tune of the fit for the class.
2 - Thread Trace the Pattern onto the Fashion Fabric. After fitting the muslin, you remove all the seam allowances and use it as the pattern piece for your jacket. Use basting thread to trace the stitching lines, then cut with wide seam allowances (in my case they were about 1 inch, some folks had them even wider). 
(BTW, I brought my Kenneth King Sewing Bag with me to hold all my tools, and it was a real trouper!)
3 - Thread Trace Some More
I did a lot of tracing of pattern pieces in my off hours at the hotel.
4 - Quilt the Lining to the Outer Fabric. For me, this was the most arduous part of the process. My bouclé did not want to cooperate, even with a walking foot. I literally had to (gently) pull and wrangle it under the foot. But I persevered and got the job done.
5 - Sew the Seams. The sewing machine gets very little use in this jacket. Basically, you machine-quilt the lining, then machine sew the outer shell seamlines: princess, shoulders, sides. That's it. After that, it's all hand-sewing.
6 - Susan Constantly Tweaks the Fit During the Class. You can see her here working with Gigi. One of the good things about that is you can make design decisions and changes on the fly. In this case, she and Gigi decided to change the princess seams from shoulder to armscye, so as not to distort the plaid.
Special note here: Sleeves are attached entirely by hand. I don't have any pictures of that, because I was too busy learning how. It's worth taking the class just to learn that method. It's work intensive, but really makes a difference in the jacket.
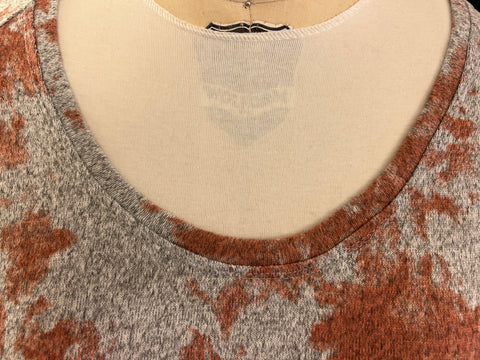
7 - Attach the Hooks and Eyes. Oy. This was the one that had me going slightly crazy. Because my fabric is so shifty, I had to remove and redo the eyes four times to get everything to line up properly. Here's my advice to my future self: Lay the jacket flat on a large table and apply the eyes while it's flat.
The Trim
Here's my most important piece of advice when it comes to making a Chanel style jacket: DON'T CHEAP OUT ON THE TRIM.
Caps/bold are completely on purpose. I have seen otherwise-lovely bouclé jackets ruined because they are trimmed with rayon gimp that you find on upholstery. Or worse, skimpy trims that are too small or too sparse. Do yourself a favor and buy the best trim you can afford. Even better, buy a couple of trims and layer them to give dimensionality. I used to have a friend who would say, "Transition between the fabric and the trim makes all the difference." And she was right about that, boy howdy.
In my case, I found three trims, all at M&J Trim in New York: petersham ribbon, velvet ribbon, and sequined floral ribbon. They are layered one atop the other, and each one is applied separately. First up was the petersham. I applied it using a double row of long running stitches along the straight edges of the garment. I mitered the sharp corners. When it came to the neckline, I used lots of steam, and tiny fell stitches at the neckline edge, to mold it to the shape of the neckline. 


The second trim is the velvet, which I centered on the petersham and affixed with a single row of running stitches. At the corners, miter in the opposite direction from the petersham, to eliminate bulk. Steam won't work with the velvet, so I used really tiny ease-stitches at the neckline. 
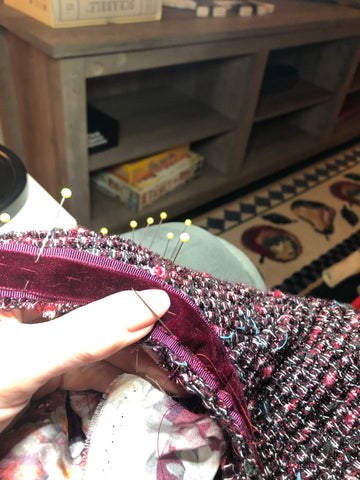
Last but definitely not least, the sequined floral ribbon. This one took the longest, because I had to stitch it between each flower. But it was flexible enough to curve readily around the neckline, so it was not too bad to apply.

Finishing
Once the trims are applied, it's just ("just" - hah!) a matter of attaching the lining to the edges of the jacket and sleeves. This is done with fell stitching, and it's a great activity to do in front of the TV. After that, clean up the ends of your fell-stitched quilted lining seams.

Getting closer! Next, apply the chain. The chain Susan sells is quite weighty, perfect for this bouclé. It also is manufactured so there are no gaps in the links, so your thread won't slip through. She recommends using doubled thread coated in beeswax. I opted instead to use pre-waxed polyamide thread that I bought at
Sil Thread in New York.
Pockets, and Done!
Last but not least, the pockets! You fell stitch the lining to the outer fabric (no need to quilt), then attach the trims. Hand sew the pockets to the jacket using fell stitches. Then guess what? Give it a good press, and you are done!!!

Conclusion
I estimate this project took me about 70 or so hours to complete. And it was worth it! I love my jacket, and I'll wear it for many years. If you ever have the chance, do take a class with Susan. It's a veritable trove of information that you can use in so many different garments.
Thanks for sticking with me through this process and post. Here are pictures of the finished jacket on me.

Happy sewing!